Lucia Kearney
Why Use Perennial Onions?
I manage the vegetable garden at Pendle Hill, a half-acre space tucked into a corner of campus that produces fruits, vegetables, and culinary herbs for the kitchen. Pendle Hill’s campus is beautiful and wooded and, much to my chagrin, heavily populated with white-tailed deer. Last season they flocked to the garden like a free buffet, helping themselves to Swiss chard and my young tomato plants. This winter, in addition to making plans for a deer fence, I’ve also come across several deer-deterrent strategies. The one that I’m most excited about is the use of perennial onions.
Why? Well, it turns out that deer cannot stand the smell of plants in the Allium genus, which includes onions. This year I’ve chosen to focus my attention on perennial onions for a few reasons. First, annual onions require a great deal of time and attention to grow; perennial varieties, on the other hand, require much less labor and maintenance once established, and will continue to produce for years. Perennial onions actually used to be much more widely cultivated than they are now, but fell out of favor with the advent of mechanical harvesting (perennial onions tend to grow in patches, whereas annual onions can be grow in uniform rows). Perennial onions also have a variety of flowers and flavors, adding forage for pollinators and flavors to your kitchen.
In my research I came across a variety of different perennial onions. The following is a selection of my favorites. Enjoy! And may your garden flourish.
Allium fistulosum (Welsh Onion)
Sometimes called bunching onion, scallion, or spring onion, Allium fistulosum will be a welcome addition to my garden this year. (I’ll be planting ‘White Spear,’ a heat-tolerant cultivar, and ‘Evergreen Hardy White,’ a cold-hardy cultivar to see which does best.)
 |
| Robert Pavlis, http://www.gardenfundamentals.com/allium-fistulosum/ |
Welsh onions have hollow, edible leaves and produce scapes. Large varieties resemble leeks, while smaller varieties look more like chives. They are similar in taste to the common onion (Allium cepa). The flowers of Allium fistulosum come in a variety of colors, and some are used as ornamentals. They form perennial, evergreen clumps, and can be propagated by division. They can also be started from seed in the early spring for transplant outdoors. They typically need about 7-10 days for germination, and about a month to reach transplant size.
Originally from China, Welsh onions have been naturalized across Eurasia and North America. They are often used in East and Southeast Asian cuisine. Miso soup in Japan often contains Allium fistulosum. My Welsh onions are doing well! I’ve got a nice patch started in my herb bed, and am excited to see how they’ll look next season.
 |
| Thin “silpa” type. https://upload.wikimedia.org/wikipedia/commons/2/2a/Silpa_%28Allium_fistulosum%29.jpg |
Allium tricoccum (Ramps)
A favorite amongst foragers and foodies, ramps (also known as spring onion, ramson, wild leek, wood leek, and wild garlic) have been dangerously overharvested in recent years. In Quebec, people are limited to harvesting 50 plants per year, and restaurants are forbidden to use them. The good news is that, if you have the right conditions in or around your garden, it is possible to start your own patch of ramps.

 |
| https://upload.wikimedia.org/wikipedia/commons/4/46/Wild_leeks_%28Whitefish_I%29_1.JPG |
Ramps like growing under forest canopies, especially canopies composed of beech, birch, sugar maple, and/or poplar. They’ll also grow under buckeyes, lindens, hickories, and oaks. They like well-drained soil high in organic matter and leaf mold. If you don’t have a wooded area nearby, you can build a shade structure for your ramps. Ramps can be grown from seed, though it will take some time for a patch to grow in this way as seeds could take years to germinate based on conditions. Direct seed in the spring or fall. If it’s possible to find seedlings, transplant out in March and April. Allow your ramps a few years to establish themselves into a patch, and then harvest by thinning in order to assure a lasting supply.
Allium tuberosum (Garlic Chives)
Native to southwestern parts of the Chinese province of Shanxi, garlic chives have been cultivated around the world.
 |
| http://www.missouribotanicalgarden.org/PlantFinder/FullImageDisplay.aspx?documentid=3882 |
 |
| http://www.missouribotanicalgarden.org/PlantFinder/FullImageDisplay.aspx?documentid=23658 |
Garlic chives can be grown in average, dry to medium, well-drained soil in part shade or full sun. Direct seeding is preferable – sow seeds ¼” deep when the soil warms in the spring. Seeds can also be started 6-8 weeks before transplant indoors.
Allium proliferum (Egyptian Walking Onions)
Egyptian Walking Onions are one of my favorite plants. I have a small patch started in the garden, and I’m hopeful they’ll spread. Allium proliferum have long, hollow leaves like Welsh Onions. Rather than producing flowers, however, they produce a cluster of bulblets. When the cluster gets heavy enough, the stalk falls over, and the bulblets sprout up from the soil, and so the onion “walks.”
 |
| https://upload.wikimedia.org/wikipedia/commons/7/7c/Allium_fistulosum_bulbifera0.jpg |
 |
| https://upload.wikimedia.org/wikipedia/commons/8/84/Allium_cepa2.jpg |
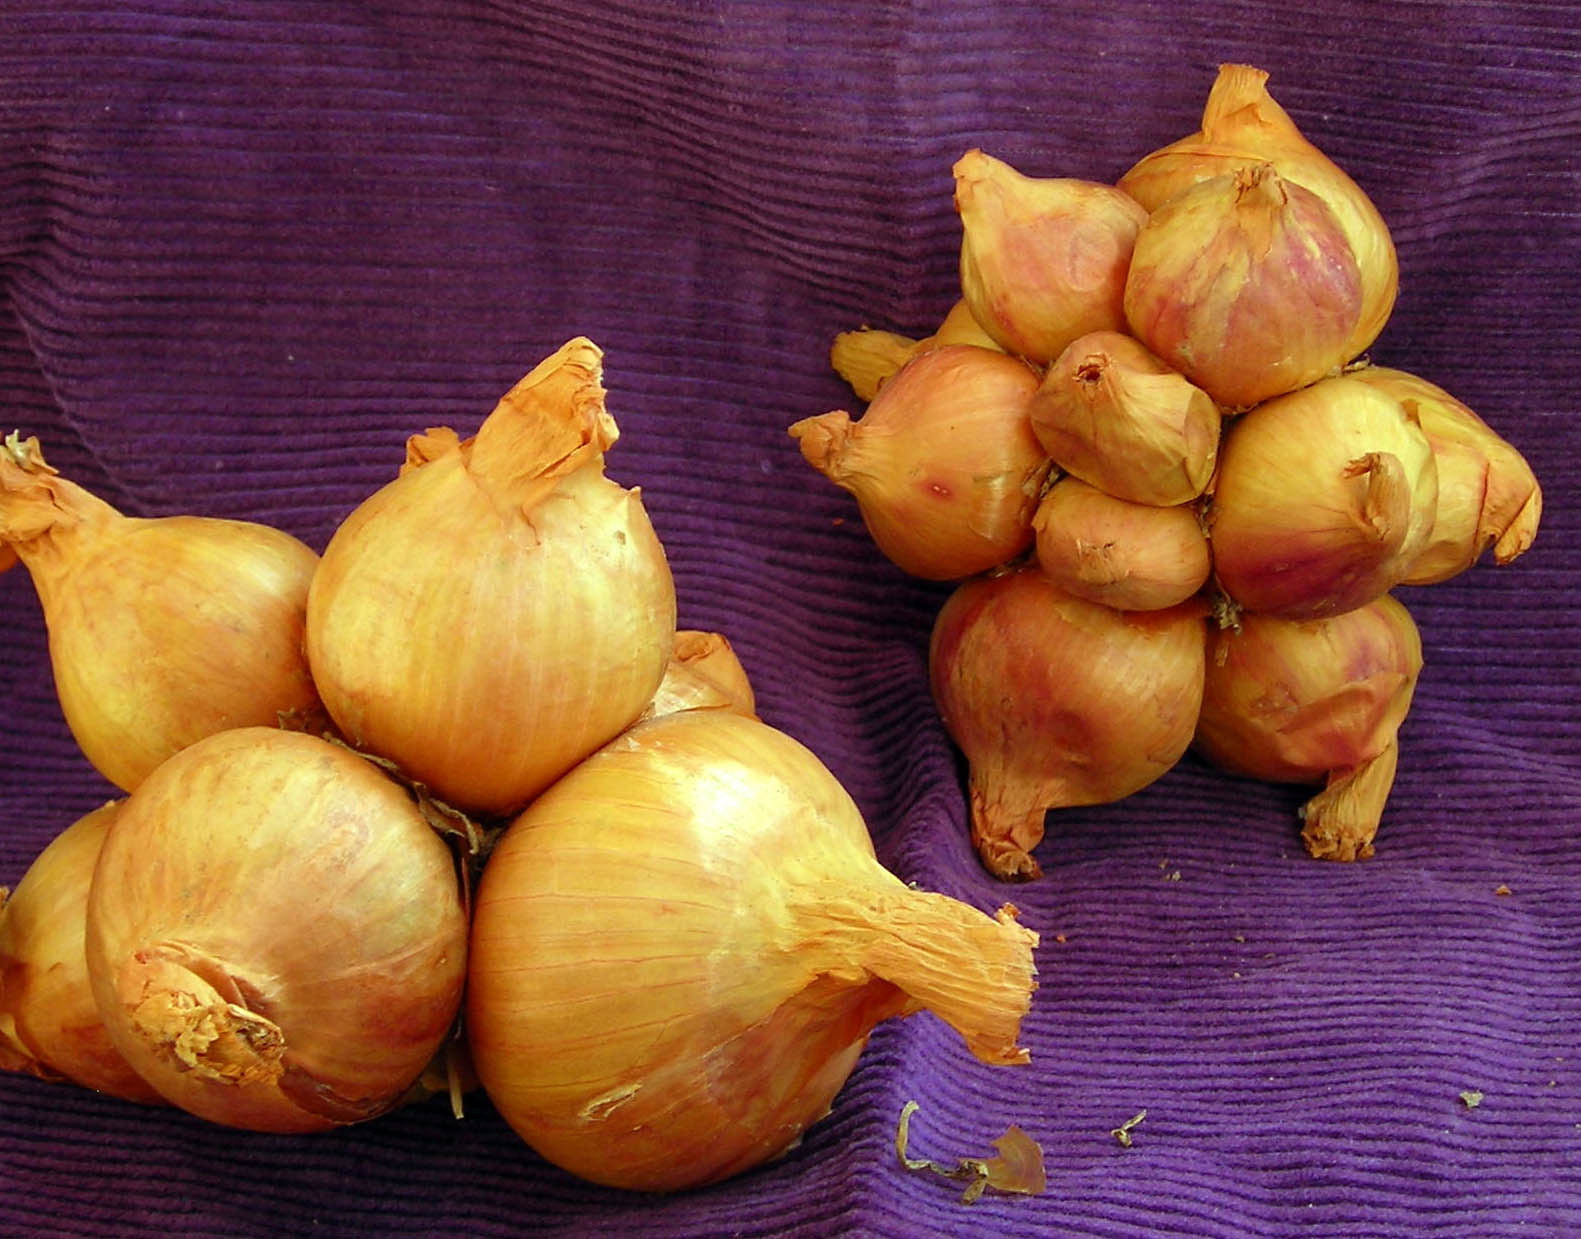
Allium cepa var. aggregatum (Potato Onions, Shallots)
I haven’t grown either of these before, but I’m excited to try! Potato onions and shallots are closely related enough that they are considered to be the same species and variety. The exact line between the two is hard to pinpoint, but potato onions are said to be larger, divide into fewer bulbs, store longer, and have a stronger flavor than shallots. They are comparable in flavor to common onions, and can be used as a substitute in recipes that call for them. Potato onions are also known as multiplier onions, pregnant onions, or mother onions.
 |
| http://edibleupcountry.ediblecommunities.com/eat/potato-onion-any-other-name |
Potato onion plants produce a cluster of bulbs attached at the base each year. To keep a patch going, you can harvest the larger bulbs while leaving the smaller ones behind to produce more bulbs the following year. Some people harvest all of their onions and replant the smallest ones the following year just like potatoes (hence the name). Potato onions are smaller than common onions, typically between 1 and 3 inches in diameter, and store very well once cured.
 |
| https://www.southernexposure.com/images/large/yellow-potato-onion_LRG.jpg |
Potato onions are heavy feeders, so they do well with a nitrogen boost in the spring. They don’t put up well with weeds either and thus also require weeding.
Shallot classification, it turns out, is a bit tricky. Most shallots are the same variety as potato onions – Allium cepa var. aggregatum – but were previously classified as Allium ascalonicum. The French gray shallot (or griselle), however, is actually a different species: Allium oschaninii; as is the Persian shallot, which refers to three species: Allium stipitatum, Allium altissimum, and Allium hirtifolium. The former is often referred to as the “true” shallot, and grows wild from central to southwest Asia. The latter is also native to central and southwestern Asia, grows on rocky slopes and in fields, and is often harvested in the wild. It has large flowers on tall slender stalks and as a result is often used as an ornamental.
 |
| Allium oschaninii, “true” shallots http://www.paridon.com/plant/Allium-oschaninii-Dutch-Yellow |
 |
| Persian Shallot, Allium altissimum http://www.edimentals.com/blog/?page_id=893 |
Originally from central/southwest Asia, shallots can range in skin color from golden brown to gray and rose red, while their flesh is typically off-white and tinged with green or magenta. Like garlic, they’re formed in clusters of offsets with a head composed of multiple cloves. As you probably know, they are widely cultivated and treasured for culinary use. They have a milder flavor than common onions, and can often be substituted for them in recipes. Finely sliced and deep-fried shallots are often used as a condiment in Asian cuisine. They can also be pickled.
| https://upload.wikimedia.org/wikipedia/commons/4/4c/Shallot_%28Sambar_Onion%29_%282%29.JPG |
While you can start shallots from seed, most are propagated via offsets. Much like garlic, they can be planted in the fall (zones 3-10) or spring, 4 to 6 inches apart with the pointed end facing up just below the soil surface. They prefer rich, loose soil, with a slightly acidic pH of around 6-6.8, though they will grow in more neutral soil. During the growing season, they need plenty of water. Green tops can be cut and used like chives as long as you’re careful to leave enough leaves to nurture the bulb. Flower stalks should be cut to in order to redirect energy towards the bulbs. Left in the ground, they’ll resprout the following season.
Allium schoenoprasum (Chives)

Chives grow wild across much of Europe, Asia, and North America. They’re commonly used as a culinary herb – all parts of the plant, including the flowers, are edible. They grow to be around 12-30 inches tall, and have small, slender, conical bulbs that grow in dense clusters. Stems and leaves are hollow and tubular, distinguishing them from garlic chives which, as we saw earlier, have flat leaves.
They are also used in gardens as pest-control – they produce sulfur compounds, which repulse many insects. At the same time, they are also great pollinator plants, producing large amounts of nectar. In a UK survey conducted by the AgriLand project, they were ranked in the top 10 for nectar production.
Grown from seed, plants will mature in the summer or early the following spring. They can also be propagated via division. In colder regions, chives die back to the ground in the wintertime, with new leaves sprouting from the bulbs in early spring. They thrive in well-drained soil high in organic matter with a pH of 6-7 and full sun. When harvesting, make sure to cut stalks down to the base. Continuously harvesting plants during the season will help to keep stalks tender for cooking.
I could go on – Allium is a large genus, comprised of hundreds of species, all of which, according to Peterson’s Field Guide, are edible. I’m sure there are plenty more perennial onions to explore!
Works Cited


